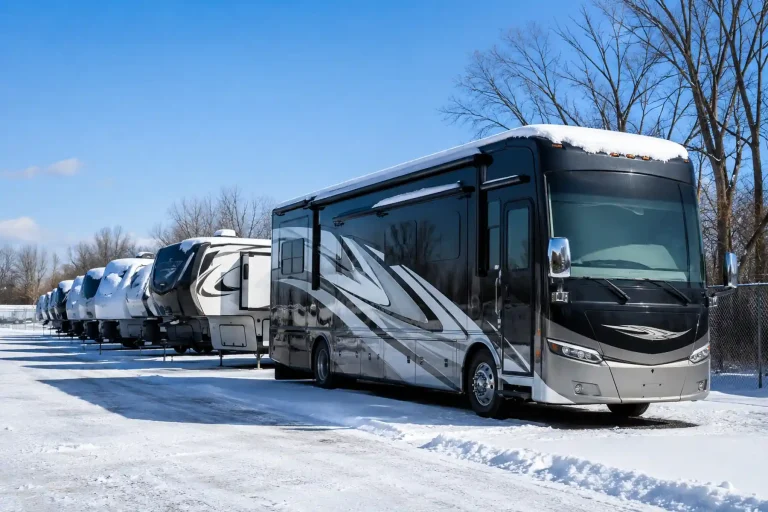
When the camping season comes to an end, parking your RV and walking away until spring is usually not enough.
Nebraska winters can bring freezing temperatures, snow, ice, wind, and long periods when your RV may sit unused. Without proper preparation, water left inside plumbing lines can freeze, batteries can lose their charge, moisture can build up inside the RV, and small openings can become invitations for pests.
Taking the time to properly prepare for RV winter storage in Nebraska can help protect your investment and make your return to camping much easier when warmer weather arrives.
At Merritt Beach RV Park in Plattsmouth, the regular camping season currently runs from April 1 through October 31. Guests with an active seasonal lease may leave their RV stored onsite during the offseason from November 1 through March 31, allowing qualifying seasonal campers to avoid relocating their RV between seasons.
Whether your RV remains at a seasonal campground or is stored somewhere else for the winter, preparation should begin before temperatures regularly drop below freezing.
Here are the major steps to consider.
Why RV Winter Storage in Nebraska Matters
An RV contains many systems that can be affected by freezing temperatures.
The most obvious concern is plumbing.
Water expands when it freezes. If enough water remains inside an RV pipe, faucet, water heater, pump, or fixture, freezing temperatures can cause cracks or other damage.
But plumbing is only one part of winter preparation.
Extended storage can also affect:
- Batteries
- Tires
- Seals
- Roof Components
- Appliances
- Upholstery
- Cabinets
- Food Storage Areas
- Electrical Systems
- Pest Control
- Interior Humidity
Winterizing your RV is therefore less about completing one task and more about preparing the entire vehicle for several months of limited or no use.
Start Before the First Hard Freeze
Do not wait until the coldest day of the year to begin winterization.
If your camping season is ending in October, use the final weeks of the season to inspect the RV and organize your winter preparation.
Waiting too long may leave you trying to drain plumbing systems after temperatures have already fallen below freezing.
A good approach is to choose a winterization date based on:
- Your Final Camping Trip
- Local Weather Forecasts
- Where the RV Will Be Stored
- Whether the RV Will Remain Connected to Utilities
- Manufacturer Recommendations
- Your Plumbing System
- Your Availability to Complete the Work
Seasonal campers at Merritt Beach should remember that the park’s camping season ends October 31, while qualifying offseason storage begins November 1.
That makes late October a natural time to complete winter preparations.
1. Review Your RV Owner’s Manual
Before draining anything or adding antifreeze, review the winterization procedures provided by your RV manufacturer.
RV plumbing systems vary.
Your rig may have:
- A Water Heater Bypass
- Low-Point Drains
- A Built-In Winterizing Connection
- Tankless Water Heating
- Multiple Water Pumps
- Residential Appliances
- Ice Makers
- Washing Machines
- Outdoor Showers
These systems may require different winterization steps.
Do not assume the procedure that worked for a previous RV is automatically appropriate for your current one.
Your owner’s manual should be your primary guide.
If you are uncertain about the process, consider having the RV professionally winterized.
2. Drain the Freshwater System
Water left inside your plumbing is one of the biggest winter-storage risks.
Begin by disconnecting your freshwater supply and draining the system according to your manufacturer’s instructions.
This may involve draining:
- Freshwater Tank
- Water Heater
- Hot Water Lines
- Cold Water Lines
- Low-Point Drains
- Faucets
- Shower Lines
- Outdoor Shower
- Toilet Supply Lines
Open the appropriate faucets and drains as instructed so water can leave the plumbing system.
Remember that simply draining the freshwater tank does not necessarily remove water from every pipe and fixture.
3. Drain and Prepare the Water Heater
Your RV water heater can hold several gallons of water.
That water needs to be addressed before freezing weather.
Before working on the water heater:
- Turn Off the Heating Source
- Disconnect Power When Required
- Allow the Water to Cool
- Relieve Pressure Safely
- Follow Manufacturer Procedures
Never remove a water-heater drain plug while the system is hot or under pressure.
Many RVs also have a water-heater bypass system used during winterization.
This prevents RV antifreeze from unnecessarily filling the water-heater tank.
Again, the correct procedure depends on your particular RV.
4. Empty the Black and Gray Water Tanks
Your wastewater tanks should also be prepared before storage.
Empty the black and gray tanks using an approved wastewater disposal method.
At Merritt Beach RV Park, individual campsites do not have sewer hookups. Local pump-out providers may service RV tanks for an additional fee, so seasonal campers should arrange any needed tank service before final winter storage preparation.
After emptying your tanks, follow your RV manufacturer’s recommendations for cleaning and winter storage.
Do not leave significant wastewater sitting in the tanks throughout the winter.
5. Winterize the Plumbing System
Once the water system has been drained, many RV owners protect the plumbing using one of two common approaches:
RV Antifreeze Method
This method circulates non-toxic RV and marine antifreeze through the plumbing system.
RV antifreeze is different from automotive engine coolant.
Never put standard automotive antifreeze into your RV freshwater plumbing system.
Depending on your RV, antifreeze may need to reach:
- Kitchen Faucet
- Bathroom Faucet
- Shower
- Outdoor Shower
- Toilet
- Low-Point Lines
- Other Water Fixtures
Follow your manufacturer’s instructions carefully.
Compressed Air Method
Some RV owners use regulated compressed air to remove water from plumbing lines.
This method requires proper equipment and careful pressure control because excessive air pressure can damage plumbing components.
Some owners use both compressed air and RV antifreeze for added protection.
If you are unfamiliar with either process, professional winterization can reduce the risk of costly mistakes.
6. Do Not Forget Smaller Water Systems
The obvious sinks and shower are not the only places where water may remain.
Depending on your RV, you may also need to winterize:
- Ice Maker
- Washing Machine
- Dishwasher
- Water Filter Housing
- Refrigerator Water Line
- Outdoor Kitchen
- Exterior Shower
- Toilet Sprayer
- Black-Tank Flush System
These smaller components are easy to overlook.
One forgotten water line can still freeze.
Create a checklist specific to your RV so you do not rely on memory alone.
7. Remove Food From the RV
Food should generally not remain inside an RV throughout winter storage.
Remove:
- Refrigerated Food
- Frozen Food
- Dry Goods
- Snacks
- Pet Food
- Cooking Oils
- Opened Ingredients
- Canned Goods That Could Freeze
- Beverages
Even dry foods can attract mice, insects, and other pests.
Check cabinets carefully.
A forgotten bag of crackers or pet treats can be enough to attract unwanted visitors.
After removing food, clean the cabinets, drawers, countertops, refrigerator, and pantry areas.
8. Clean the Refrigerator and Freezer
Turn the refrigerator off according to the manufacturer’s storage instructions.
Remove all food and wipe down the interior.
Allow the refrigerator and freezer to dry thoroughly.
If recommended by the manufacturer, leave the doors slightly open during storage to improve airflow and reduce odors or mildew.
You can also inspect:
- Door Seals
- Drain Tubes
- Exterior Vents
- Interior Shelves
Do not close a damp refrigerator for several months and expect it to smell fresh in spring.
9. Deep Clean the RV Interior
Winter storage is easier when the RV begins the offseason clean.
Vacuum:
- Floors
- Carpets
- Furniture
- Under Beds
- Storage Compartments
- Cabinets
Wipe down:
- Countertops
- Sinks
- Tables
- Bathroom Surfaces
- Cabinet Interiors
- Appliances
Food crumbs and residue can attract pests.
Cleaning also gives you an opportunity to inspect areas you may normally overlook.
Watch for:
- Water Stains
- Mold
- Loose Trim
- Cracks
- Pest Droppings
- Damaged Seals
- Soft Flooring
Finding these issues before winter can prevent a small problem from becoming much larger.
10. Control Moisture Inside the RV
Moisture can be a significant problem during long-term storage.
Temperature changes can create condensation, especially when there is limited airflow.
Too much moisture may contribute to:
- Musty Odors
- Mold
- Mildew
- Damp Upholstery
- Cabinet Damage
- Window Condensation
Depending on your storage conditions, moisture absorbers or other appropriate moisture-control products may help.
Make sure any product you use is suitable for unattended RV storage.
You should also inspect the RV for existing leaks before winter.
Moisture control products cannot compensate for water entering through a damaged roof or seal.
11. Inspect the Roof and Exterior Seals
Before winter, carefully inspect your RV exterior.
Pay particular attention to areas around:
- Roof Vents
- Skylights
- Air Conditioners
- Windows
- Doors
- Exterior Lights
- Ladder Mounts
- Antennas
- Slide-Outs
- Roof Seams
Look for cracking, separation, missing sealant, or other signs that water could enter.
Snow and melting ice can find small openings.
Repairing a questionable seal in fall is usually easier than discovering water damage in spring.
Use sealants that are compatible with your RV’s roof and exterior materials.
12. Inspect Slide-Out Seals
If your RV has slide-outs, inspect the rubber seals before storage.
Look for:
- Cracks
- Tears
- Dirt Buildup
- Loose Sections
- Signs of Water Entry
Follow your RV manufacturer’s recommendations regarding slide position during long-term storage.
Some owners store slides retracted to reduce exposure, but procedures can vary by RV design.
Do not rely on a universal rule when your manufacturer provides specific instructions.
13. Protect Your RV From Pests
Mice can fit through surprisingly small openings.
Before winter storage, inspect the RV exterior and undercarriage for potential entry points.
Common areas to inspect include:
- Plumbing Openings
- Electrical Openings
- Storage Compartments
- Utility Connections
- Vent Areas
- Floor Penetrations
- Under-Sink Plumbing
Seal openings using RV-appropriate materials without blocking required ventilation.
Also remove anything that could attract pests.
That includes:
- Food
- Pet Food
- Paper Bags
- Trash
- Food Residue
Check drawers and cabinets one final time before leaving the RV.
14. Prepare Your Batteries
RV batteries require attention during extended storage.
A battery left partially discharged for months can lose capacity or become damaged.
The correct winter-storage procedure depends on:
- Battery Type
- Storage Temperature
- Whether Shore Power Remains Connected
- Charging System
- Manufacturer Recommendations
Some owners remove batteries and store them in an appropriate location with periodic maintenance charging.
Others keep batteries installed with an approved charging system.
Lithium and lead-acid batteries may have different storage requirements.
Follow the battery manufacturer’s guidance rather than applying the same procedure to every battery type.
15. Check Tire Condition and Pressure
Your RV tires will support significant weight while the vehicle remains stationary.
Before storage:
- Check Tire Pressure
- Inspect Sidewalls
- Look for Cracking
- Check Tread Condition
- Inspect for Damage
- Confirm Valve Caps Are Secure
Inflate tires according to appropriate manufacturer specifications.
If your RV will remain outside, RV tire covers may help reduce exposure to sunlight and weather.
Do not improvise lifting or supporting an RV unless the manufacturer specifically recommends a procedure.
Improper support can damage the frame, suspension, or leveling system.
16. Stabilize the RV Properly
A seasonal RV that remains in one location for the winter should be stable and properly positioned.
Follow the manufacturer’s guidelines for:
- Leveling
- Stabilizers
- Landing Gear
- Wheel Chocks
Do not rely on stabilizer jacks to support loads they were not designed to carry.
The goal is to keep the RV secure without placing unnecessary stress on the frame.
17. Disconnect or Secure Propane Systems
Review your RV and propane-appliance manufacturer guidance regarding propane storage.
Depending on your RV and storage arrangement, you may need to:
- Turn Off Propane Cylinders
- Inspect Hoses
- Check Connections
- Secure Cylinders
- Remove Portable Propane Items
Never store portable fuel containers or combustible materials inside the RV unless specifically designed and approved for that purpose.
If you smell propane or suspect a leak, have the system inspected by a qualified technician.
18. Remove Batteries From Small Devices
Do not forget about smaller electronics.
Remove batteries from items such as:
- Flashlights
- Remote Controls
- Clocks
- Thermometers
- Portable Fans
- Toys
- Other Battery-Powered Devices
Old batteries can leak during extended storage and damage electronics.
This is a small task that can prevent unnecessary replacement costs.
19. Protect the RV Exterior
Give the exterior a thorough cleaning before winter.
Remove:
- Dirt
- Bugs
- Bird Droppings
- Tree Sap
- Road Grime
Inspect the awning and make sure it is completely dry before retracting it for long-term storage.
A damp awning stored for months may develop mildew.
Also secure:
- Storage Doors
- Windows
- Roof Vents
- Exterior Accessories
- Steps
- Antennas
- Outdoor Kitchens
Anything that can move during strong winter winds should be properly secured.
20. Consider Whether You Need an RV Cover
RV covers can provide additional protection from weather, dirt, and sunlight.
However, the wrong cover can create problems.
A poorly fitted tarp may rub against exterior surfaces in the wind and damage paint, vents, or roofing materials.
If you use a cover, choose one designed for RV storage and sized appropriately for your rig.
Make sure it does not block required ventilation.
Check your RV manufacturer’s recommendations before covering the vehicle.
21. Remove Valuable and Sensitive Items
Do not treat your stored RV like a permanent storage unit.
Remove valuables and items that may be affected by extreme temperatures.
Consider removing:
- Electronics
- Important Documents
- Medication
- Cameras
- Valuable Tools
- Temperature-Sensitive Products
- Personal Identification
- Expensive Outdoor Equipment
Take anything home that you would not want to leave unattended for several months.
22. Photograph Your RV Before Storage
Take photos of your RV after winterization and before leaving it for the season.
Photograph:
- Exterior Condition
- Roof When Safely Accessible
- Tires
- Campsite
- Interior
- Plumbing Areas
- Battery Compartment
- Storage Compartments
These photos can be useful if you forget how something was configured or want to compare the RV’s condition in spring.
They can also provide a record of completed preparation.
23. Create a Winterization Checklist
Do not depend entirely on memory.
A simple checklist can help you confirm that nothing important was overlooked.
Your RV winter-storage checklist might include:
- Drain Freshwater System
- Drain Water Heater
- Empty Black Tank
- Empty Gray Tank
- Winterize Plumbing
- Winterize Appliances With Water Lines
- Remove Food
- Clean Refrigerator
- Clean RV Interior
- Inspect Roof
- Inspect Exterior Seals
- Check Slide Seals
- Protect Against Pests
- Prepare Batteries
- Check Tires
- Secure Propane
- Secure Awning
- Remove Valuables
- Photograph RV
- Lock Windows and Doors
Keep your completed checklist somewhere you can find it when you reopen the RV.
24. Keep a Spring Reopening List
Winterizing is only half of the process.
Write down anything you will need to reverse when camping season returns.
For example:
- Reinstall Batteries
- Reconnect Water Systems
- Flush RV Antifreeze
- Inspect Plumbing for Leaks
- Restore Water-Heater Settings
- Check Propane Appliances
- Test Electrical Systems
- Inspect Tires
- Check Roof and Seals
- Clean the Interior
- Test Smoke and Carbon Monoxide Detectors
- Replace Detector Batteries as Needed
- Restock Emergency Equipment
- Inspect Fire Extinguisher
- Reinstall Food and Supplies
A reopening checklist can save time and reduce the chance of forgetting a winterization step.
Off-Season RV Storage at Merritt Beach RV Park
Seasonal campers at Merritt Beach have an additional convenience.
Guests with an active seasonal lease may leave their RV stored onsite from November 1 through March 31, rather than relocating the RV after the camping season ends. The campground’s regular season runs from April 1 through October 31.
Seasonal sites are designed for guests who keep their RV at the same site throughout the camping season, allowing them to return to the same setup from April through October.
This can remove the hassle of towing a large RV to a separate winter-storage facility.
However, leaving the RV onsite does not eliminate the need to properly winterize it.
Owners remain responsible for preparing their RV for freezing temperatures, protecting the plumbing system, securing personal belongings, and following campground and manufacturer requirements.
Why Seasonal RV Storage Can Make Spring Easier
Moving an RV twice every year can require significant preparation.
You may need to:
- Retract the Entire Campsite Setup
- Hitch the Trailer
- Tow It to Storage
- Pay for Separate Storage
- Tow It Back in Spring
- Re-Level the RV
- Rebuild the Campsite
For qualifying seasonal campers who store their RV onsite, much of that relocation work can be avoided.
When the camping season returns, you can focus on reopening and preparing the RV instead of transporting it back to the campground.
For large fifth wheels and destination-style trailers, that convenience can be particularly valuable.
Common Winter Storage Mistakes to Avoid
Even experienced RV owners can overlook small details.
Try to avoid these common mistakes:
Waiting Until After a Freeze
Plumbing damage can occur before you complete winterization.
Watch the forecast and prepare early.
Forgetting an Appliance Water Line
Ice makers, washers, and outdoor kitchens may have plumbing that is easy to miss.
Leaving Food Behind
Food can attract pests even when sealed.
Ignoring Roof Seals
A small leak can cause significant damage over several months.
Storing the RV While Damp
Moisture trapped inside can create odors, mildew, and other problems.
Forgetting Battery Maintenance
A neglected battery may not be ready when spring arrives.
Leaving Wastewater in the Tanks
Empty and properly prepare your holding tanks before extended storage.
Using the Wrong Antifreeze
Only use products specifically designed for potable RV plumbing when your winterization procedure requires antifreeze.
When Should You Hire a Professional?
Winterizing an RV is manageable for many owners, but there is nothing wrong with hiring a professional.
Professional winterization may be worth considering if:
- This Is Your First RV
- You Have a Complex Plumbing System
- Your RV Has a Washer or Dishwasher
- You Have a Tankless Water Heater
- You Are Unsure About Your Water-Heater Bypass
- You Cannot Locate All Low-Point Drains
- You Do Not Have the Proper Equipment
- You Want an Experienced Technician to Inspect the RV
The cost of professional winterization may be small compared with repairing damaged plumbing in spring.
Prepare Now for an Easier Spring
Winter storage is really about protecting next year’s camping season.
A few hours of preparation in the fall can help you avoid opening your RV in spring and discovering:
- Cracked Plumbing
- Dead Batteries
- Pest Damage
- Mold
- Roof Leaks
- Damaged Tires
- Unpleasant Odors
Instead, you can begin spring by inspecting the RV, reversing your winterization steps, connecting utilities, and getting back to camping.
Plan Your Seasonal RV Stay at Merritt Beach
If you enjoy returning to the same campground throughout the season, a seasonal RV site can eliminate much of the repeated setup and teardown associated with shorter stays.
Merritt Beach RV Park’s seasonal RV sites allow guests to keep their RV set up throughout the April through October camping season. Qualifying seasonal guests with an active lease may also leave their RV onsite during the November through March offseason.
Sites include water hookups and 30/50-amp electric service, along with access to campground amenities including the swimming lake, stocked fishing lake, beach area, playground, and outdoor recreation.
Whether your RV remains at Merritt Beach or is stored somewhere else in Nebraska, proper winterization is one of the most important things you can do to protect it between camping seasons.
Prepare the plumbing, inspect the exterior, control moisture, protect your batteries and tires, remove food, and create a checklist before leaving your RV for the winter.
Then, when April returns, you can spend less time dealing with storage problems and more time getting ready for another camping season.
Call Merritt Beach RV Park at 402-979-1196 or request seasonal site availability online to learn more about seasonal RV sites, offseason storage eligibility, current requirements, and availability.